Month: July 2023

template

How to analyze IOCs before and after a cyber-attack

On June 27, JumpCloud discovered an APT attack. The company’s IR shared some IOCs to allow the customers or others third parties to protect their infrastructure.

As a Security Analyst, you should pay attention to the IOCS provided  https://jumpcloud.com/support/july-2023-iocs .

The purpose of this article is to help the Analyst to detect and investigate different IOCs such as domains and IP addresses before or after an attack occurred.

Having a look at the domains from the list of IOCs, the first impression that would come in your mind is to check if the domains are FP or not.

Example of some Domains from the IOCs:

nomadpkgs[.]com

centos-repos[.]org

datadog-cloud[.]com

toyourownbeat[.]com

datadog-graph[.]com

centos-pkg[.]org

primerosauxiliosperu[.]com

zscaler-api[.]org

nomadpkg[.]com


As you see, some of the domains name are quite similar to the names of well-known service providers , companies for example we can observe some domains names with the name of some service providers such as  Zscaler, Centos . As an Analyst, you should always be able to check such suspicious IOCs before making any conclusion.

Let’s take the example of a few domains:

zscaler-api[.]org 

https://www.virustotal.com/gui/domain/zscaler-api.org/details

Whois Lookup

Administrative city: REDACTED FOR PRIVACY

Administrative country: REDACTED FOR PRIVACY

Administrative state: REDACTED FOR PRIVACY

Create date: 2023-06-23 00:00:00

Domain name: zscaler-api.org

Domain registrar id: 1068

Domain registrar url: http://www.namecheap.com

Expiry date: 2024-06-23 00:00:00

Name server 1: dns1.registrar-servers.com

Name server 2: dns2.registrar-servers.com

As you see, the result from Virustotal shows that the domain is a newly created, this is the first hint for us. As we know, most of domains used by threat actors are newly created. As Zscaler is a well-known brand,  we can check the main domain of Zscaler to make a comparison between the both domains.

zscaler.com (Zscaler legitimate domain)

https://www.virustotal.com/gui/domain/zscaler.com/details

After checking the main domain of Zscaler (zscaler.com), we can observe that the zscaler.com is located at (Subject: C=US 2.5.4.15=Private Organization 2.5.4.5=4431830 L=San Jose O=Zscaler, Inc. ST=California 1.3.6.1.4.1.311.60.2.1.2=Delaware 1.3.6.1.4.1.311.60.2.1.3=US CN=www.zscaler.com )

Whois Lookup gave the following details:

Admin Country: US

Admin Organization: Zscaler, Inc.

Admin State/Province: CA

Creation Date: 2008-07-14T22:12:34+0000

Creation Date: 2008-07-14T22:12:34Z

DNSSEC: unsigned

Domain Name: ZSCALER.COM

Domain Name: zscaler.com

With this information, we can assume that the domain zscaler-api[.]org is not from Zscaler.

NB: It is always a good practice to check the browser search such as Google or Bring search to get some information about the domains.

The second example are the two domains nomadpkg[.]com and nomadpkgs[.]com

In this example, we will type the domain nomadpkg[.]com on Google search if we can find any related information, by doing that, we found a similar domain nomadpackaging.com a packaging website.

https://whois.domaintools.com/nomadpackaging.com

Dates     6,355 days old

Created on 2006-02-22

Expires on 2024-02-22

Updated on 2023-02-08

After checking the two domains, we found out that they are newly created

https://whois.domaintools.com/nomadpkg.com, https://whois.domaintools.com/nomadpkgs.com  and no specifics information were found about them over the internet.

At this point, based on the naming convention, we may assume that the domains are probably mimicking the nomadpackaging.com. But for us, it is a hint for us to block such domain.

You can use the same technics we showed to analyze others domain such as centos-pkg[.]org and centos-repos[.]org or domains mentioned in the list.

NB: One thing to mention, during our investigation, we found a link https://www.usom.gov.tr/url-list.txtAlt  where most of the domains available in https://jumpcloud.com/support/july-2023-iocs were reported as malicious one. You can use this link to upload the domain in your SIEM tool in order to monitor any interaction with any of them.

Now, lets analyzed some IP addresses detected during the investigation:

https://jumpcloud.com/support/july-2023-iocs

66.187.75.186

104.223.86.8

100.21.104.112

23.95.182.5

78.141.223.50

116.202.251.38

89.44.9.202

192.185.5.189

Most of the IP addresses mentioned above, look normal, seeing such traffic in your network, it is very difficult to guess that, it could be used by a threat actor. But you can use some technics to find more information about a specific IP address.

Let’s start:

In this case, a tool like https://www.abuseipdb.com did not help that much as the IP addresses look normal and most of them were not reported of any abuse, then we check the tool like https://securitytrails.com/ to list the domain behind the IP address.

By checking the domains on the IP address, we found the domain toyourownbeat[.]com (one of the domains mentioned above) address hosted on the IP address

https://securitytrails.com/list/ip/192.185.5.189
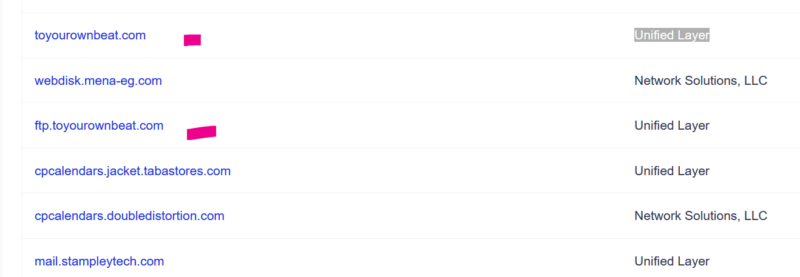
We found on the subdomains of toyourownbeat[.]com:

webmail.toyourownbeat[.]com                 

mail.toyourownbeat[.]com

Which could be a sign of phishing message sends to different users that interact with the website.

https://securitytrails.com/list/apex_domain/toyourownbeat.com .

I know this is a time consuming, but it is better to consume a time to analyze one indicator than to be hacked because of not analyzing it. Always stay focus and be patient.

malware backgroung

How to statically analyze a malware

The static malware analysis is analyzing malicious a file without executing it.

A Static analysis can help you  to detect or find indicator that can prove that the file is malicious.

Once you perform a static analysis, the following details can be revealed:

  • Hashes of the file
  • Identified if the file is packed
  • Imports and exports
  • Libraries used
  • Strings embedded in the file
  • Digital certificates
  • Detecting the files format type
  • Finding details such as (domain, IP address and others)

 NB: For security reason, we are not providing you the malicious file.

Imagine that you received a suspicious file to analyze at work, your job will be to set up your Sandbox t to perform your investigation.

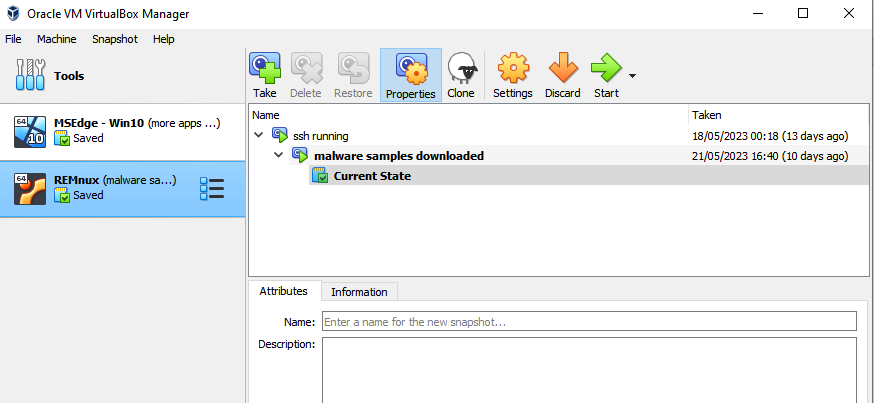
We already have set up our sandbox, we have installed two machines (Windows guest and Remnux).

Remnux is a prebuild Linux machine for malware analysis, you can download the OS: Get the Virtual Appliance - REMnux Documentation

Windows guest was downloaded from Download a Windows virtual machine - Windows app development | Microsoft Developer. There is a new version of Windows to download Windows 11.

VirtualBox can be downloaded from Downloads – Oracle VM VirtualBox

After installing the machines and the VM, you can install Flare VM (a set of tools for malware analysis for Windows) from GitHub - mandiant/flare-vm.

Flare VM does not come with all the applications for the analysis, so you must install some tools such as PEid, BinText, PeStudio, Dependency walker and others based on your needs.

When we finished to install all the applications, the environment looks like this:

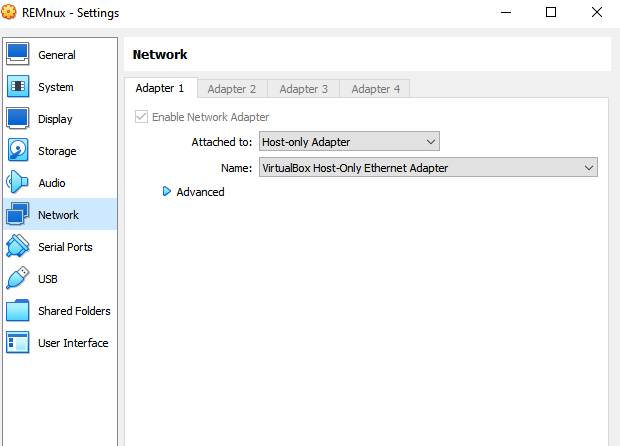
The both guests’ machines are running in “Host Only Network” which means that they don’t have any internet connection.

NB: One important thing, take the snapshot of the machine before you start the investigation so you can go back to a secure state after the investigation.

Let’s start the investigation.

 1. Strings command

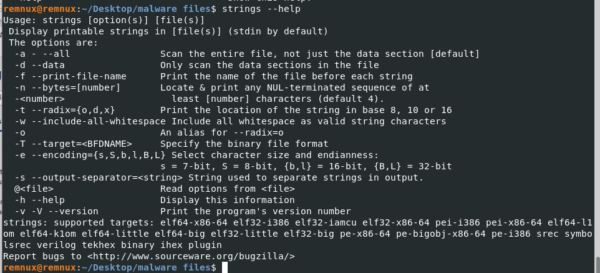
In Remnux host. The String command helps you to find the strings embedded in the file.

First, type the help option to find more details about the command.

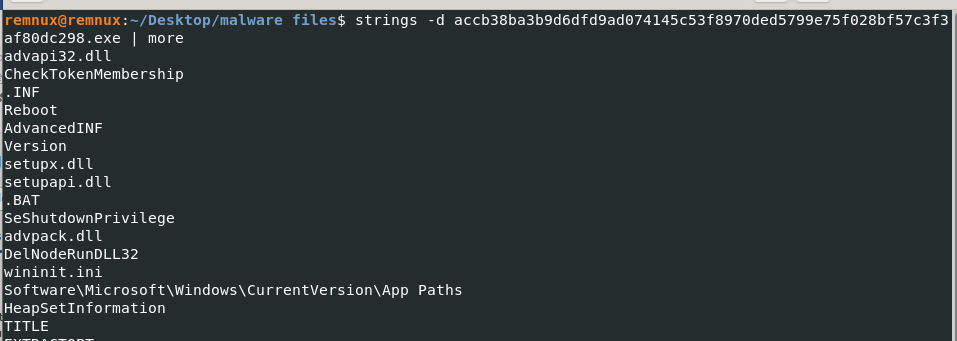
Run the command with the file:

2. Pestr

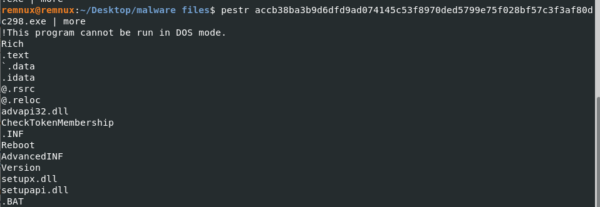
In Remnux host, go and open the terminal. Type the command with the file name below.

You can put the output in a file to have a better view of the output

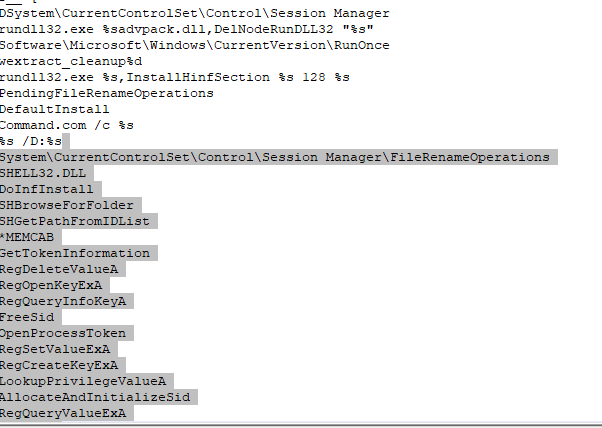
The output

At this point, we can observe some indicators such as imports, libraries call and dll extension files, persistency method used in the registry, domain name and others. This is a good point as most of the malware usually used those attributes.

3. PEiD

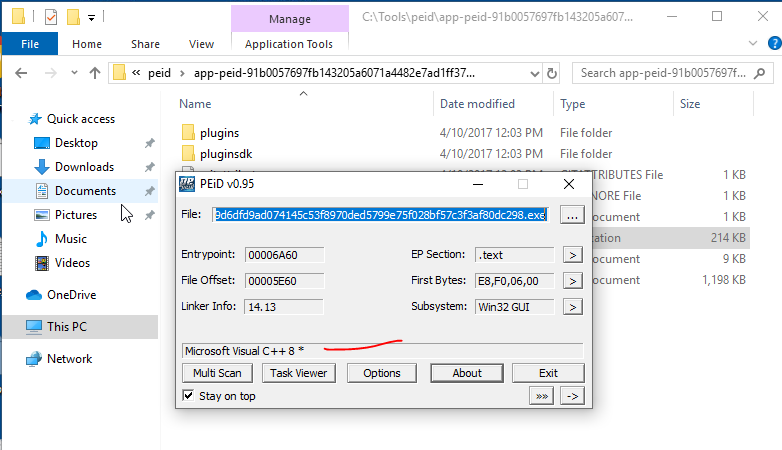
In Windows host. The tool is used to detect common packers, crypto and compilers for PE files.

Take the file that you analyzing and drag in the tool, in our case the file is not packed, we can see that the file is written in C++.

4. PEStudio

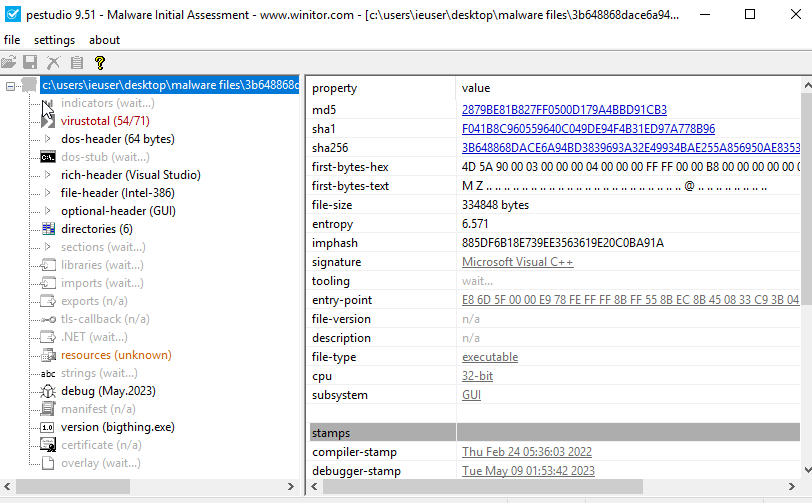
In Windows host. The tool is very useful for the static analysis, it can detect the following information:

  • File signature
  • Imports
  • Export
  • URL and IP addresses
  • Show Virus total score
  • Virus total scoring
  • Strings embedded in the files

Run the tool, drag the application in the tool and go through each option from the left side and analyze the output on the right side.

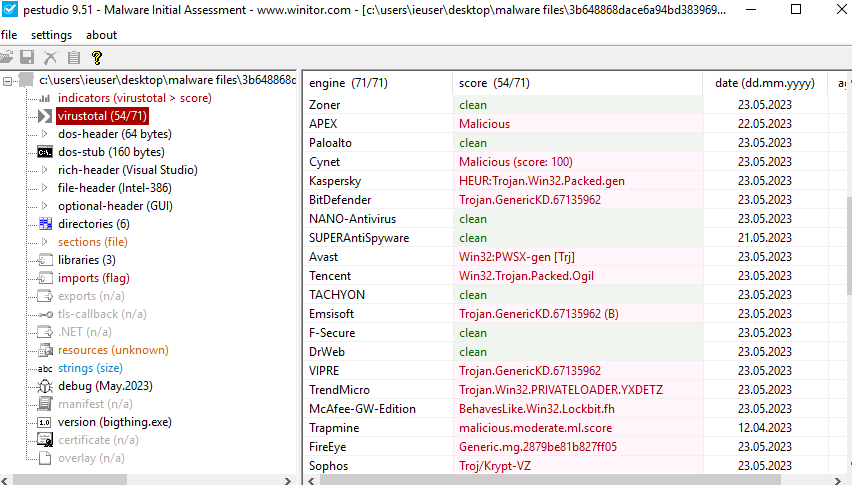
Virus Total scoring

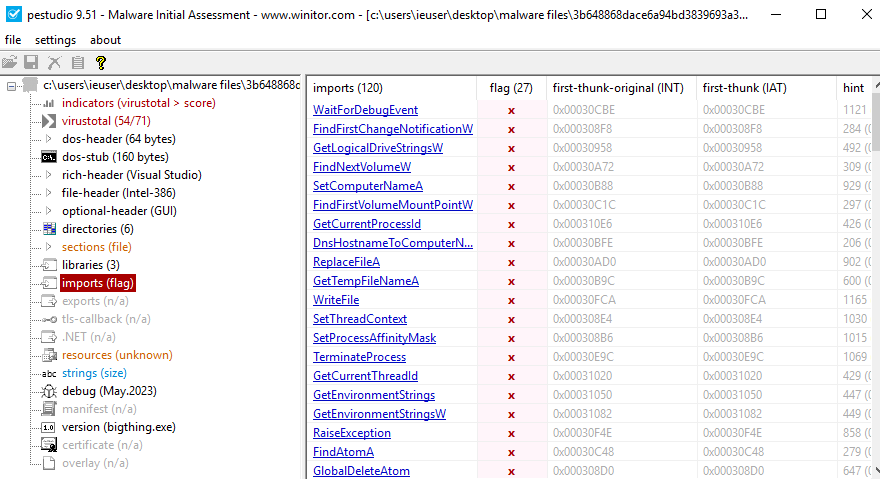
Imports

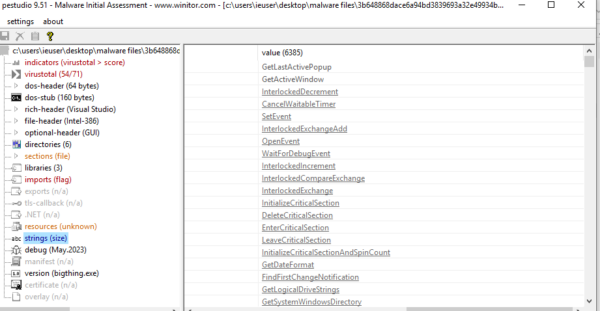
Strings

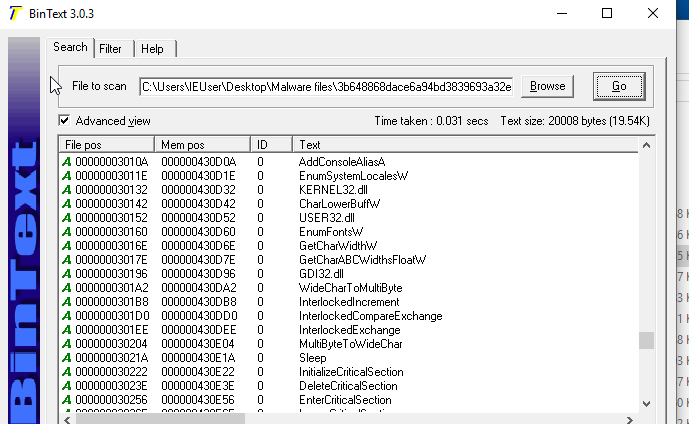
5. BINTEXT

 In Windows host. Run the tool and it will display the strings embedded in the file.

6. Peframe

The tool is used to analyze a portable executable files, it can detect if the file is parked, anti-debug digital signature, xor, mutex, anti-virtual machine, suspicious sections and functions, macro and others.

In Remnux host. Type the command following file the file name you are analyzing.

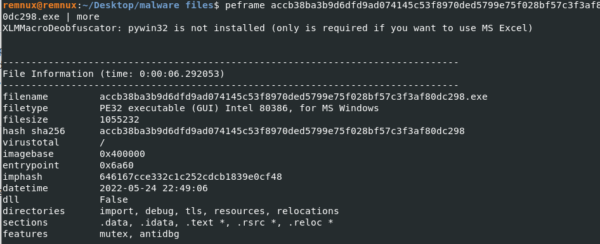
We got some details about the files visible in the screen such as the (hash of the file, PE32 which means that the file is Windows executable file, the file size and others).

NB: You can list all the tools used in Remnux for malware analysis by type the command in the capture below.

7. Dependency Walker

In Windows host.

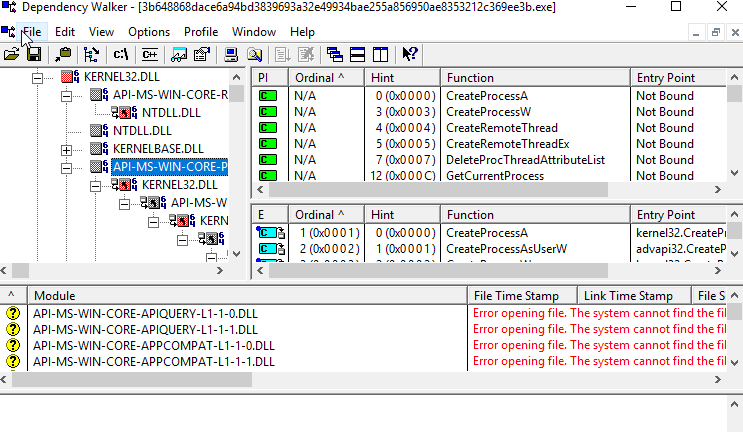
After dragging the file in the tool, you can see the DLL files with the handles (imports and exports) related to each.

You can type the name of the DLL file on the internet to know what it does.

Now your static analysis finished, you can collect the information and provide a report.

Static analysis of malware is very important, it helps analyze the malware without running it and collect basics information about the malware. The information collected can help us detect if the file is a malware.

wp post author plugin 1

How did i fix my WordPress website after being hacked?

On the 29.06.2023, my website osintafrica – intelligency blog was hacked.

The threat actor created two accounts with the Author privilege and posted two posts on the website.

In the next lines, i will describe how I managed and fixed the issue.

When i connected to my website, i found a strange post. It was very surprising for me, because  i was not the author of the posts, so i decided to analysis the issue.

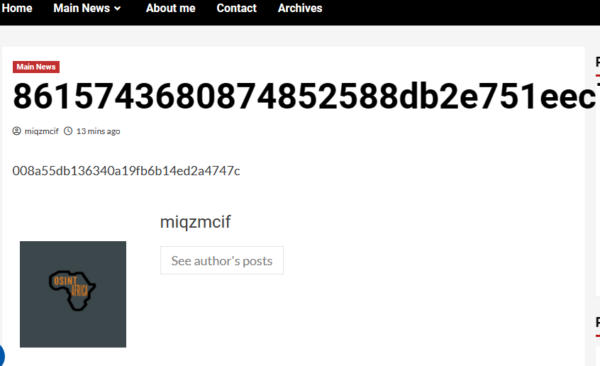
                                          Figure 1 Post published by the threat actor

As you see on the image above the user “miqzmcif” was the Author of the post.

I connected to my WordPress backend, i checked the user menu to find all the users account created on the website, i found out two new users accounts created (miqzmcif@ds.sdf and 0erwybgp2j9n9btwm8foxn@gmail.comfollowing with my user admin .

Figure 2 Two new users created by the threat actor

With the email addresses of the two users created, i checked the name and email addresses created  via Google search, unfortunately no information was found.

Next steps, i did, was to verify if there is any plugin with a vulnerability that can be exploited  to get the access to my website and create a user account or publish a post. I checked all the plugins one by one via Google search to find any issue related to them, while checking the plugins, I found the only plugin with a vulnerability among all the plugins (WP Post Author version 3.2.3) that has a critical vulnerability discovered a few days ago WP Post Author <= 3.2.3 - Privilege Escalation (wordfence.com)

The WP Post Author plugin is used to create and edit the author on WordPress website, at this point, it was quite obvious for me that the plugin was the issue.

Before I deactivated and removed the plugin with the two users created, a WPScan was run on the website to check if there is any vulnerability. At the time it was the scan was run, no issue was detected that could be used by a threat actor to perpetrate the attack.

After that, i decided to harden my website, I enable the auto update option on all the plugins, installed a web access Firewall and IDS to protect the website.

NB: It worth mentioning that, before I was hacked, I would not imagine that my blog could be hacked.

So as a great example, i encourage all of you to follow the best practice like we described in our situation to protect you WordPress website or any others website.